Get Famous Branded Quality at Factory Cost
Pls inquire to sales@danddhardware.com
\\: +86 139 2903 7292
Author: Site Editor Publish Time: 2025-07-14 Origin: Site


A panic bar, also known as a crash bar or push bar, is an essential safety device installed on exit doors to allow quick and easy egress during emergencies. Commonly found in commercial buildings, schools, and public facilities, panic bars ensure compliance with fire codes and enhance building security.
If you're looking to install a panic bar on a door, this guide will walk you through the process step by step. Whether you're a DIY enthusiast or a facility manager, understanding the installation process ensures proper functionality and safety compliance.
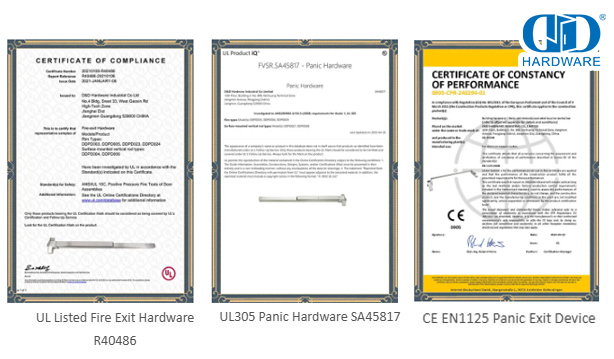
D&D Panic Exit Hardware Certification:
✔️ Panic Exit Device-BS EN1125 200,000 cycles test, EN1634 Fire Rated 132/240mins, EN1670 Corrosion Resistance 240 hours.
✔️ Fire Exit Hardware- UL 10C Fire Rated 3 Hours, File No.R40486
✔️ Panic Hardware-UL305, File No.SA45817

A panic bar is a horizontal bar mounted on the interior side of a door. When pushed, it releases the door latch, allowing people to exit swiftly without needing to turn a knob or lever. Panic bars are required by building codes in high-occupancy areas to prevent dangerous bottlenecks during evacuations.
1.Rim Panic Bars – Surface-mounted, suitable for narrow stile doors.
2.Mortise Panic Bars – Recessed into the door for a more streamlined appearance.
3.Vertical Rod Panic Bars – Feature rods that extend to the top and/or bottom of the door for added security.
Before starting, gather the following:
· Panic bar hardware kit
· Tape measure
· Pencil or marker
· Drill and drill bits
· Screwdriver (Phillips and flathead)
· Chisel (for mortise installations)
· Level
· Safety glasses
1.Determine the ideal height for the panic bar (typically 36–48 inches from the floor).
2.Hold the panic bar against the door and mark the screw holes with a pencil.
3.Use a level to ensure the bar is straight before finalizing the markings.
1.Select a drill bit slightly smaller than the screws provided.
2.Drill pilot holes at the marked locations to prevent wood splitting.
1.Align the panic bar with the pilot holes.
2.Secure it in place using the provided screws.
3.Ensure the bar moves smoothly when pressed.
1.For rim panic bars, the latch is surface-mounted on the door edge.
2.For mortise panic bars, you may need to chisel out a recess for the latch.
3.Test the latch to confirm it engages and releases properly.
1.Check that the door opens easily when the panic bar is pressed.
2.Tighten any loose screws and ensure smooth operation.
3.Conduct multiple tests to verify reliability.
· Incorrect Placement – Installing the panic bar too high or too low can hinder operation.
· Loose Screws – Failing to tighten screws properly can cause malfunctions.
· Ignoring Fire Codes – Always check local regulations for compliance.
· Regularly inspect screws and hardware for looseness.
· Lubricate moving parts annually.
· Test the mechanism periodically to ensure smooth operation.
Installing a panic bar is a straightforward process that significantly improves building safety. By following this guide, you can ensure a secure and code-compliant installation. Whether for a business, school, or public facility, a properly installed panic bar provides peace of mind during emergencies.
For professional installations or complex door setups, consider consulting a locksmith or security expert. Stay safe and ensure your exits are always accessible!
Click here for additional details on panic exit device.
Now contact us.
Contact information for David Jian
Contact number: 0086-139 2903 7292
Email address: sales@danddhardware.com